Configuration
Creating API Credentials
UnoPim allows you to generate API credentials that control access to the platform through integrations. The process includes setting up API keys, configuring permissions, assigning users, and generating secret keys.
Steps to Create API Credentials
- Navigate to the Integrations Tab:
- Go to Configuration -> Integrations in the UnoPim admin panel.

Click on Create:
- Under the API Keys section, click the Create button to start the process of creating a new API key.
General Section:
- In the General Section, provide the following details:
- Name: Enter a unique name for the API key.
- Assign User: Choose the user who will be assigned to this API key.
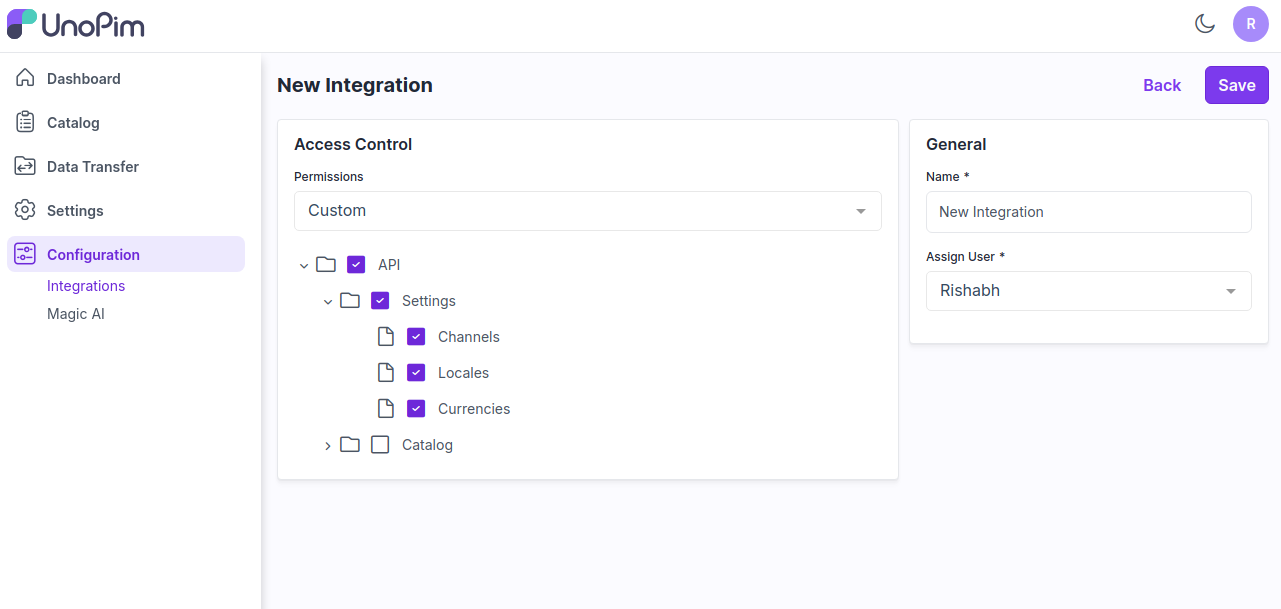
- In the General Section, provide the following details:
Access Control:
Navigate to the Access Control Section, where you'll configure permissions for the API key.
Permissions Field: You’ll see two options for setting permissions:
- All: Grants full access to the API key across all features.
- Custom: Allows you to define specific permissions.
If you select Custom, the following options will appear:
- Settings Permissions: Use checkboxes to select which settings the API key can access.
- Catalog Permissions: Similarly, choose catalog-related permissions using checkboxes.
Save and Activate:
- After filling out the necessary details and selecting permissions, click Save to generate the API credentials.

Generate Secret Key:
- Once saved, a Generate Secret Key button will appear.
- Click on this button to display the Client ID and Secret Key.
- These credentials will be used to access UnoPim's APIs.

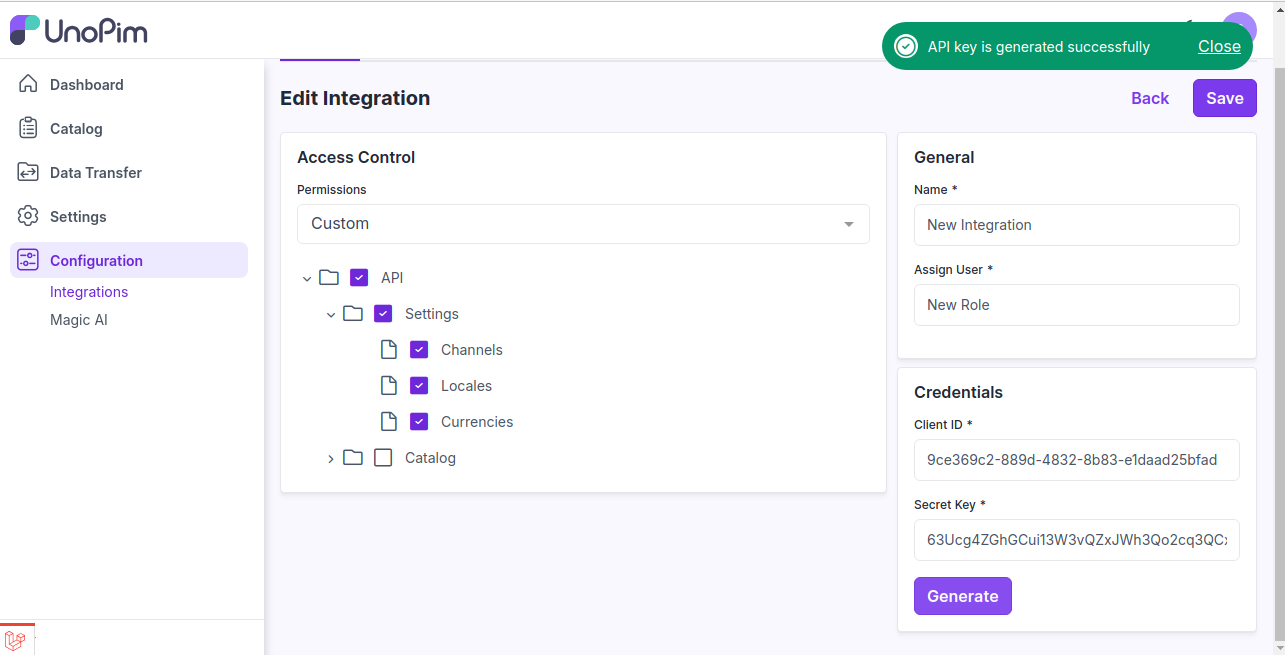
Note : Re-Generate Secret Key:
- After generating the secret key, a Re-Generate Secret Key button will be available.
- Use this button to regenerate the secret key if needed.
Create API Credentials User Guide
For more detailed reference, you can consult the UnoPim User Guide here.
Set up Postman
UnoPim provides a Postman collection and environment to simplify API testing and exploration.
Step by step
Download Postman:
- If you haven’t already, download and install the Postman application from the official website.
Download the required files:
- Download the following files to your system:
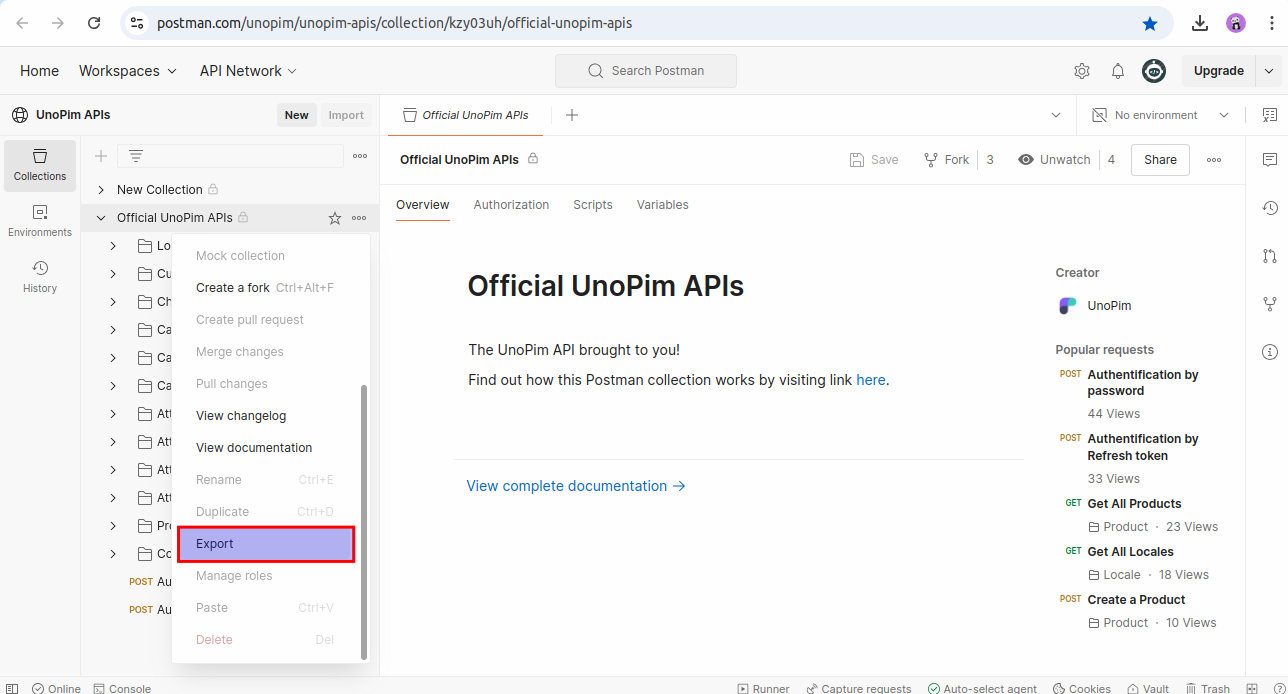
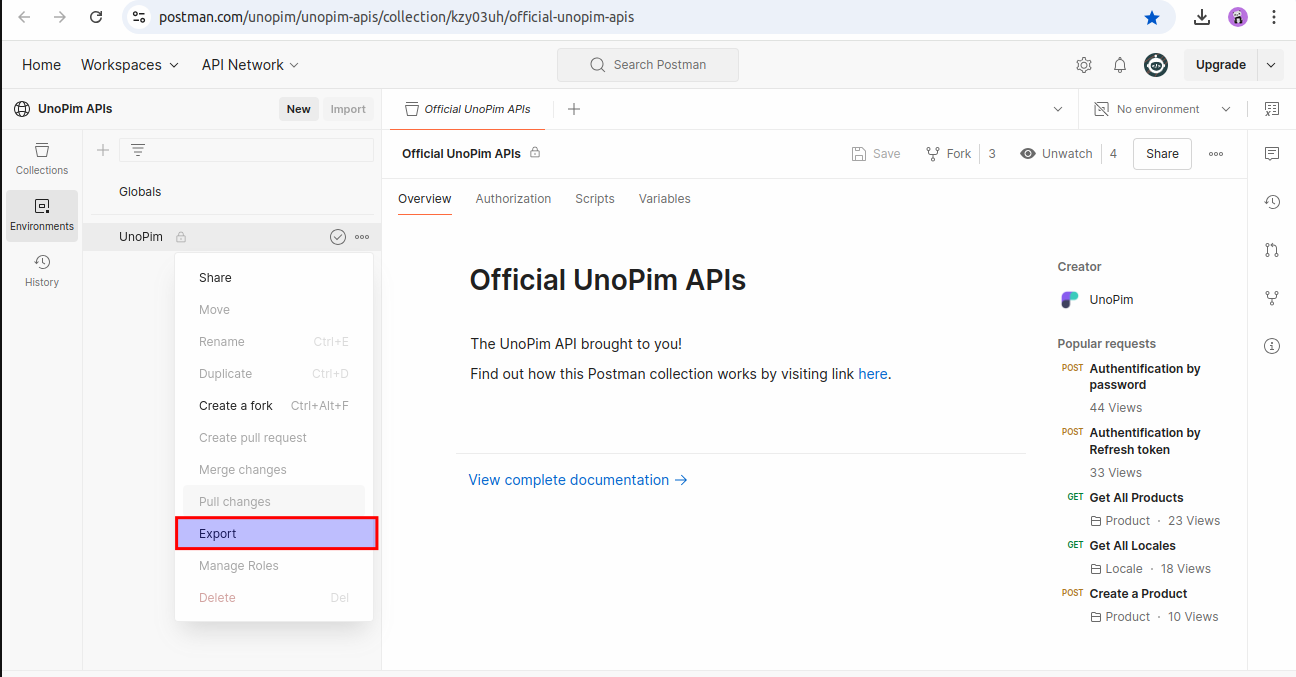
Import into Postman:
- Open Postman and use the Import button to add both the collection and environment files.
Select Environment:
- Once the environment is imported, select the UnoPim API environment from the environment dropdown menu.
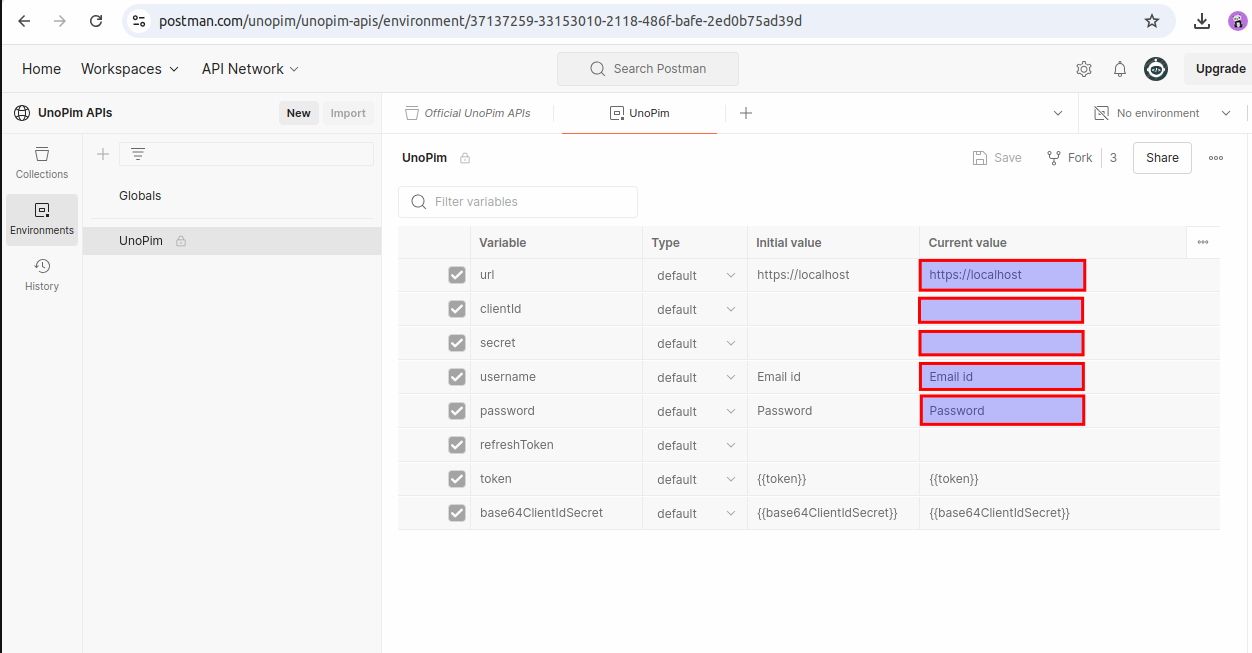
- Set the Environment variables, including the username, password, clientId, secret, and the URL of the application.
Send a Request:
- Now you can send your first request using the pre-configured Postman collection to interact with UnoPim APIs.